
Because “infrastructure as code” means it’s “code” after all, working effectively with variables is going to be a core competency on your journey to mastering Red Hat’s Ansible.
For its part, Ansible gives you quite a bit of flexibility in terms of how you can inject, update, and even register new variables whenever you run a playbook. In the latter case, Ansible’s register task parameter is especially helpful, because you often won’t be able to know at Ansible playbook runtime what certain values are going to be. Take launching AWS EC2 instances as a basic example. By default, you can’t know what their public IP addresses are going to be at launch, but you might need to know these values later in your workflow.
When it comes to provisioning public cloud infrastructure, leveraging Ansible is an excellent choice. What follows below is an Ansible playbook that will launch a couple of EC2 instances.
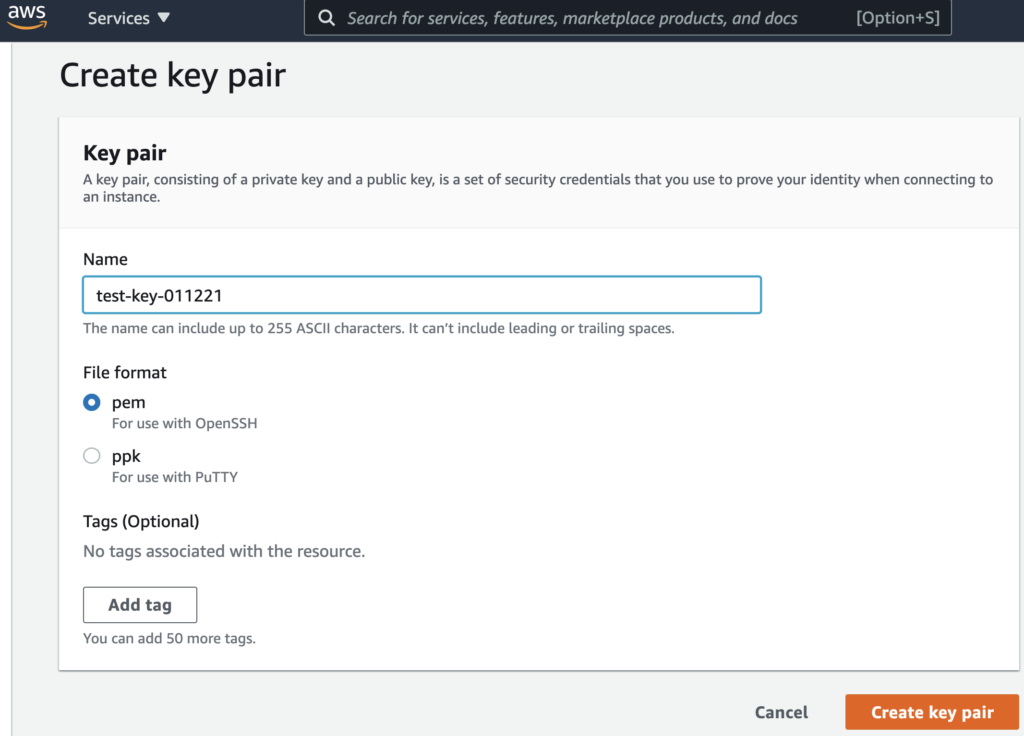
(To test this playbook on your own laptop, you’ll need to have your AWS access key and secret key defined in a separate creds.yml file… And if you actually want to SSH into these instances next, you’ll also want to have created a valid SSH key_name whose .pem file you’ve then loaded in your SSH agent… And yes, we typically recommend protecting secrets even in a simplified example like this. Check out this recent Level Up video for a complete demo of Ansible Vault if you haven’t seen it in action previously!)
Upfront, to run the below playbook:
$ ansible-playbook -i localhost \
aws-ec2-launch-example.yml \
--vault-password-file ~/.vpass.txt
The contents of our aws-ec2-launch-example.yml:
---
- hosts: localhost
  connection: local
  name: AWS EC2 Launch Example
  gather_facts: false
  vars_files:
    - creds.yml
  vars:
    key_name: test-key-011221
    instance_type: t2.micro
    region: us-west-2
    image: ami-0841edc20334f9287
    count: 2

  tasks:

    - name: launch EC2 instance(s)
      amazon.aws.ec2:
        key_name: '{{ key_name }}'
        instance_type: '{{ instance_type }}'
        aws_access_key: "{{ aws_access_key }}"
        aws_secret_key: "{{ aws_secret_key }}"
        region: '{{ region }}'
        image: '{{ image }}'
        wait: yes
        count: '{{ count }}'
      register: result

    - debug:
        var: result
The lines to highlight above are the last three:
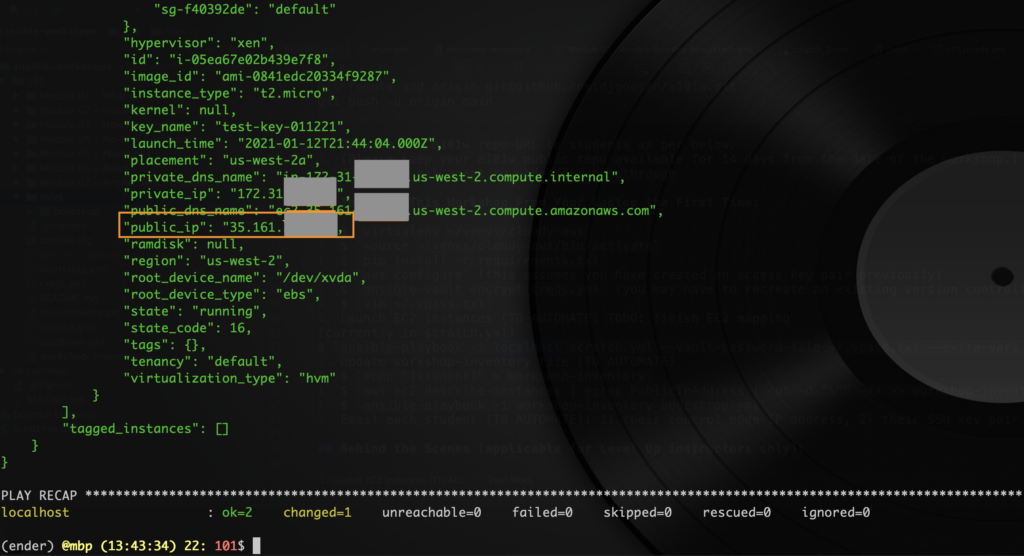
1. The register: result line captures everything the amazon.aws.ec2 module gets back from AWS and puts it in a variable. This allows us to do things like pass the result to other parts of the playbook… print it to stdout… or do anything else you can think of doing with its text:

2 & 3. The subsequent debug task will print the data in the var: result to stdout. This allows for further parsing of details like public IP addresses:
As an aside: What’s one advantage of variabilizing even inputs like instance_type, that you may not expect to change as frequently? Well, beyond the fact that it makes for a more generic and reusable playbook (pretty much always a good thing), using variables lets you trivially inject different key-value pairs via methods like ansible-playbook‘s builtin -e EXTRA_VARS, –extra-vars EXTRA_VARS flag at runtime (e.g., instance_type=m4.large). This definitely beats having to constantly modify your underlying infrastructure code files, especially in real world scenarios where you’re sharing your code repos with the entire team.
In conclusion, being able to register variables in your Ansible playbooks makes working with and transforming any task output pretty much trivial. And mastering this fundamental infrastructure code pattern will also bring you one step closer to your longterm goal of automating basically everything in sight!